 microServiceBus.com DOCS
Using the Console
microServiceBus.com comes with a Console feature which provides similar output as you’d have through a terminal. Enabling Console output is a very powerful and common way to debug your Service and Flow. It will provide you with insight of how your Services behave and any issues you might experience.
Enabling Console output
By default, Console output is disabled, and you should always remember to disable it when your are done as Console output will add extensively to your data usage.
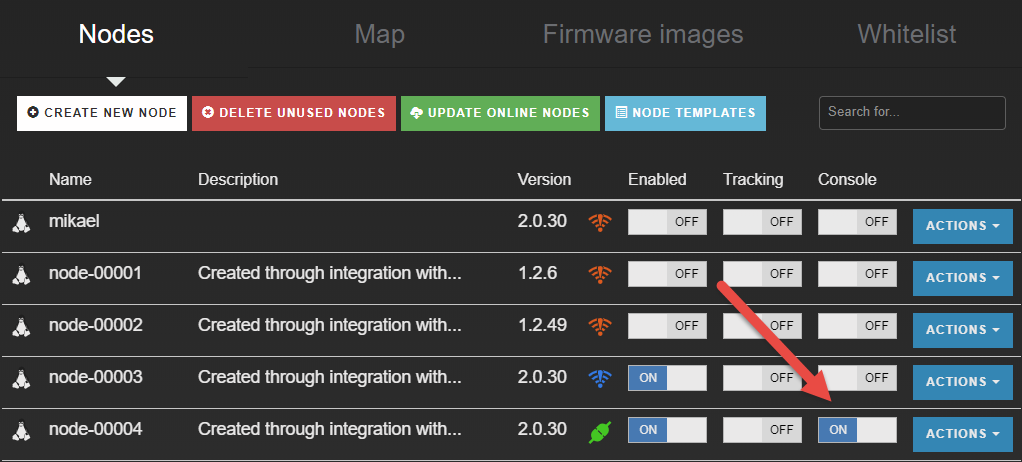
To enable the Console output, navigate to the Nodes page, and simply toggle the Console button of the Node you’d like to work with.
Write to Console from Service
Without doing anything else, you will only see default output from the Node. To write your output from your Service, leave the Console window open, and open up a new window and navigate to the Service script and open the editor.
To write to the Console output, use the Debug function as:
this.Debug('Connectd to the serial port');
Debug statements will work as console.log() and will always be visible in the terminal, however they will only be visible in the Console output if enabled in the portal.
Similarly, you can also use the ThrowError function to track errors:
this.ThrowError(context, '[YOUR ERROR CODE]', '[DESCRIPTION]');
Part from sending the exception information to the Console, the ThrowError function also submit tracking information, which can optionally be sent to Issue tracking systems like ServiceNow.
The context parameter is optional, and only relevant if it exists such as in the Process function.
Use an error number lower than 90000, as error code above are reserved for microServiceBus.com.
Use the Console
To view the output, simply navigate to the Console in the portal.
Tip: If other developers are using the Console at the same time as you, the output can be exhausting. -Use the filtering option and set it to the name of your Node.
Related content:
- Home
- Common Linux terminal commands
- Get insight using tracking
- Import nodes from CSV files
- Installing microServiceBus-node
- Working with meter configuration
- Migration information
- Node installation scripts
- Work with Node VPN interface and peers
- Reviewing the Audit log
- Roles, privilages and auditing
- Running microServiceBus-node on a yocto image
- Developing JavaScript Services in microServiceBus.com
- Developing Python Services in microServiceBus.com
- Site verification
- Using the Node terminal
- Using the Console
- Default keyboard shortcuts
- Working with service properties
Report bugs, broken links or missing images.. Create Issue